While I do have a great bivy bag as a solo shelter, for sleeping in a tarp I made another simple bivy bag, which should serve my sleeping bag as an additional layer to become windproof and water-repellent (e.g. from condensation water under the tarp). In this post I explain from what materials I made it, and some instructions on how to make it, including my patterns.
Why another bivy bag?
Already two years ago I made myself kind of a hybrid of a bivy bag and a person tent. I am quite satisfied with it, and love it for solo trips, particularly in winter time. Yet, I am still experimenting with different types of shelters for my hiking and skiing trips, and thus made myself a tarp this autumn. However, the tarp does not entirely keep out wind, and my regular three season sleeping bag is not windproof either. Thus I decided to also make a very simple bivy bag. This new bivy should be an additional layer of protection for my sleeping bag against wind, humidity, or condensation water inside the tarp, but remain very breathable. Moreover it should also be much lighter than the spacious bivy I made before. According to these specifications I wanted to use a windproof and water-repellent material (like, for example, Pertex® Endurance), but of course the patterns could also be used with a waterproof fabric.
Bivy Bag Concept
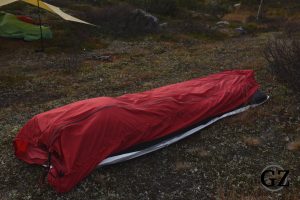
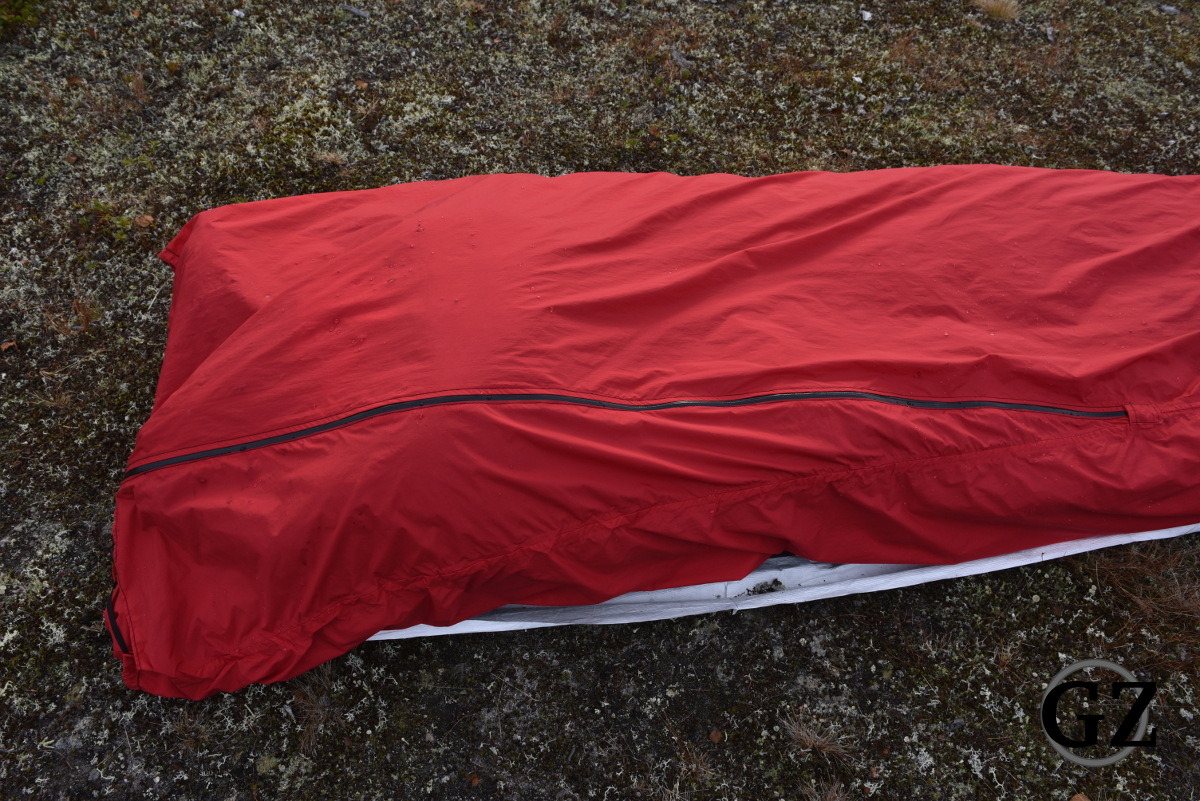
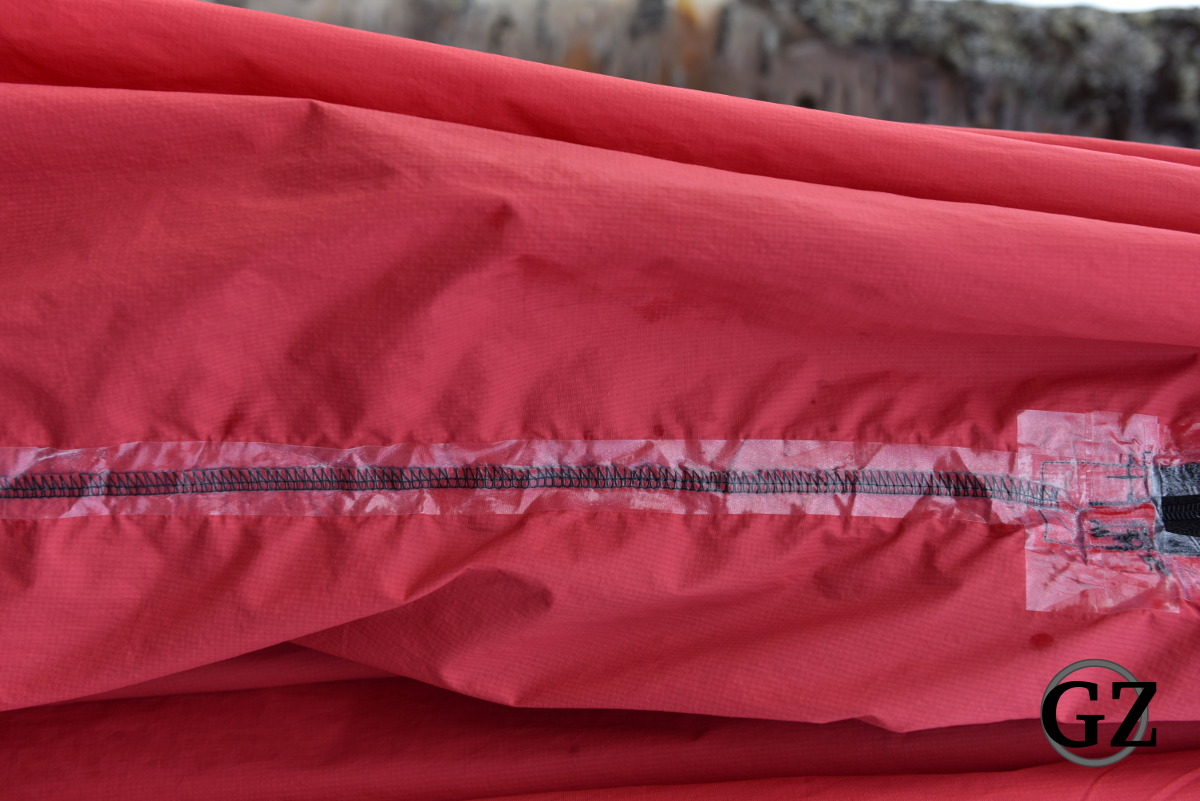
The form I made is thus a very simple one, as it is basically is just supposed to be a cover for my sleeping bag. I only took a piece of fabric, slightly cut it according to my needs (see pattern below), and sewed it together like a tunnel. I added some additional material for the upper part to make it wider, and attached a water-repellent zipper (YKK Aquaguard).
The shape of the pattern is supposed to fit the mummy shape of my sleeping bag. While the lower/feet part is symmetric, the idea was that at the part for the upper body – the conic shape – should be asymmetric. The idea was, to have the zipper not exactly on the side of the bivy, but to get it slightly on top of me when laying inside. I was thinking that this shape would make it more convenient to get in & out of the bivy.

Material List
- 2.5m of windproof and water-repellent Ripstop-Nylon, coated, 60g/qm
- 1.2m YKK Aquaguard 3C Zipper
- 1 pcs zipper slider
- 4m of Seamtape (for coated fabrics)
Costs, Weight and Measures
The materials cost me altogether approximately 45€.
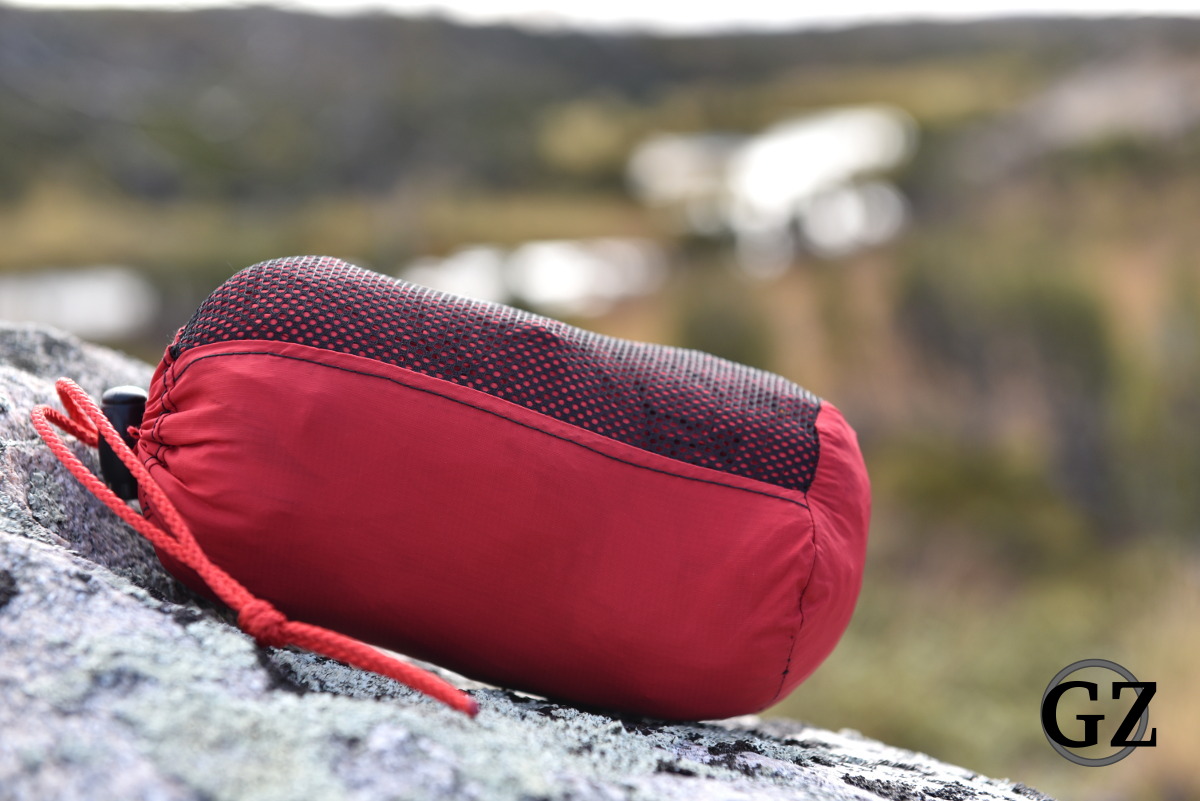
Including pouch and cord etc. the bivy weighs 280g (~10oz), and measures packed 8x17cm (3.1×6.7 inches).
How-To: Instructions for Making the Bivy Bag
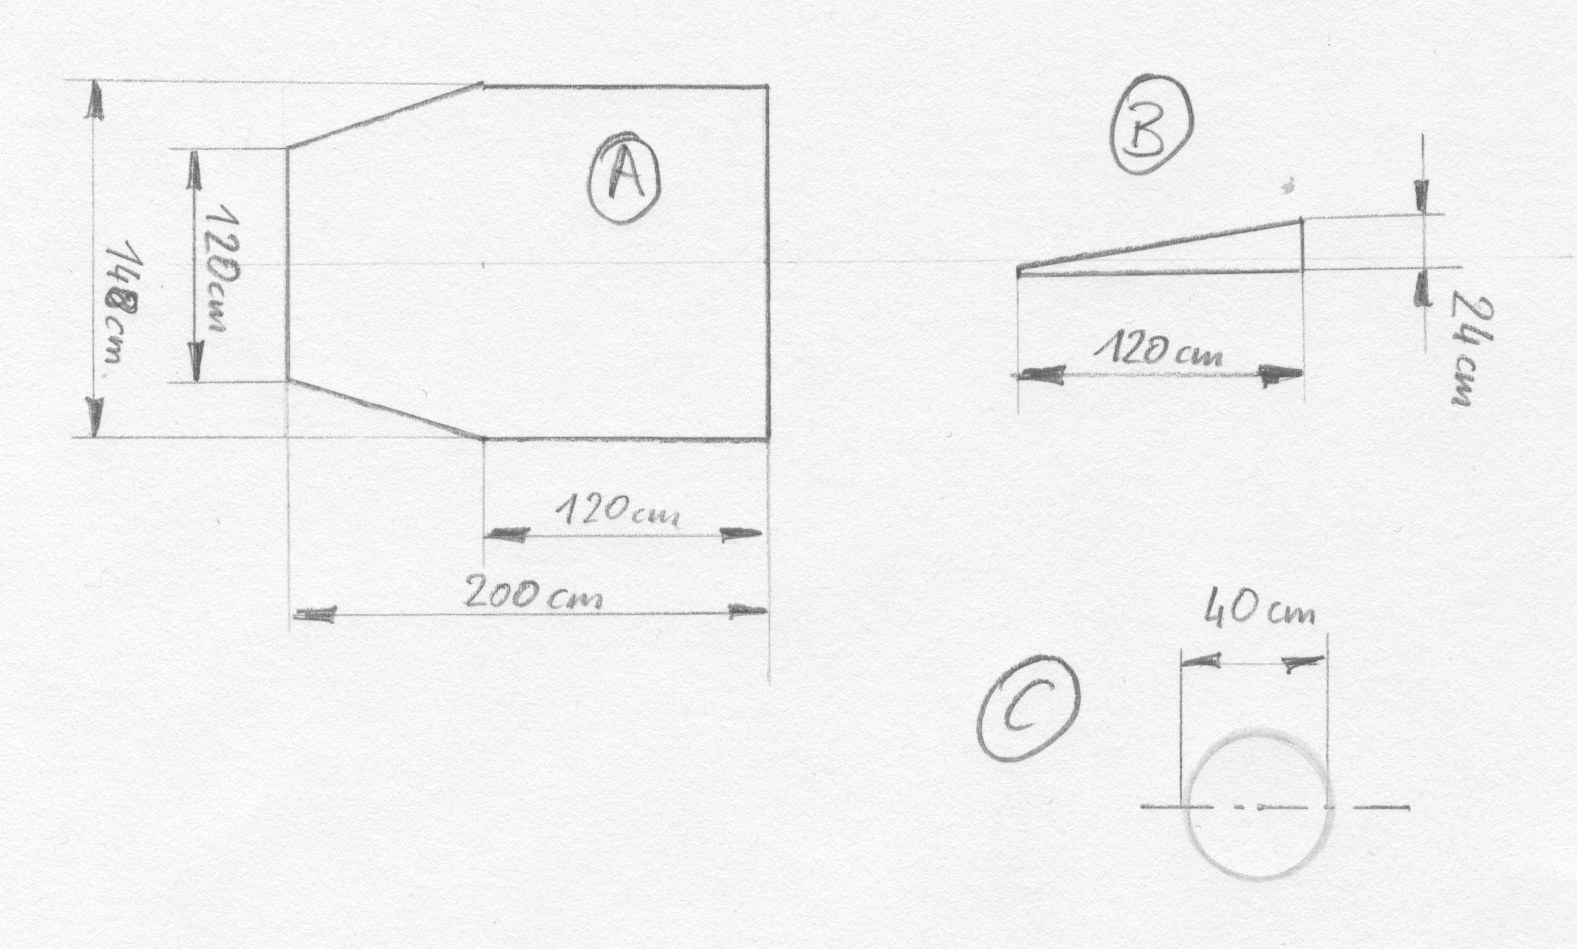
- Considering the width of the material I chose, I figured that basically I can just create a tunnel from that material, by simply sewing together the edges along the fabric. However, since all my sleeping bags are mummies, I wanted to adjust the shape of the bivy to that of my sleeping bags. This should not only allow a better fit, but also reduce weight. Thus I first cut the fabric accordingly (without seam allowance):

Sketch for patterns of bivy bag - I then started to sew together the leg room, which are the 80cm of part A that were cut conically, in order to make a tunnel. Sewing from the left side, so that the seams would be inside.
- Next step was to sew one side of the zipper to part B.
- Attaching the part B to the main piece of fabric (on the non-zippered side).
- Sewing the second side of the zipper to part A, thus finishing sewing in part B into part A.
Now we have a conic tunnel. - With the 2.5m of fabric, the round, bottom part (part C) needs to be sewed together from two halves. So step 6 is to sew together to halves of a circle.
- Sewing in the round bottom part (part C), made in 6., into the tunnel. Sewing from the left side of the fabric (so that the seams would be inside).
- Folding around the fabric on the head side of the tunnel, so that a cord would fit in, which is used – together with a cord-lock – to close the bivy above the shoulders, if necessary.
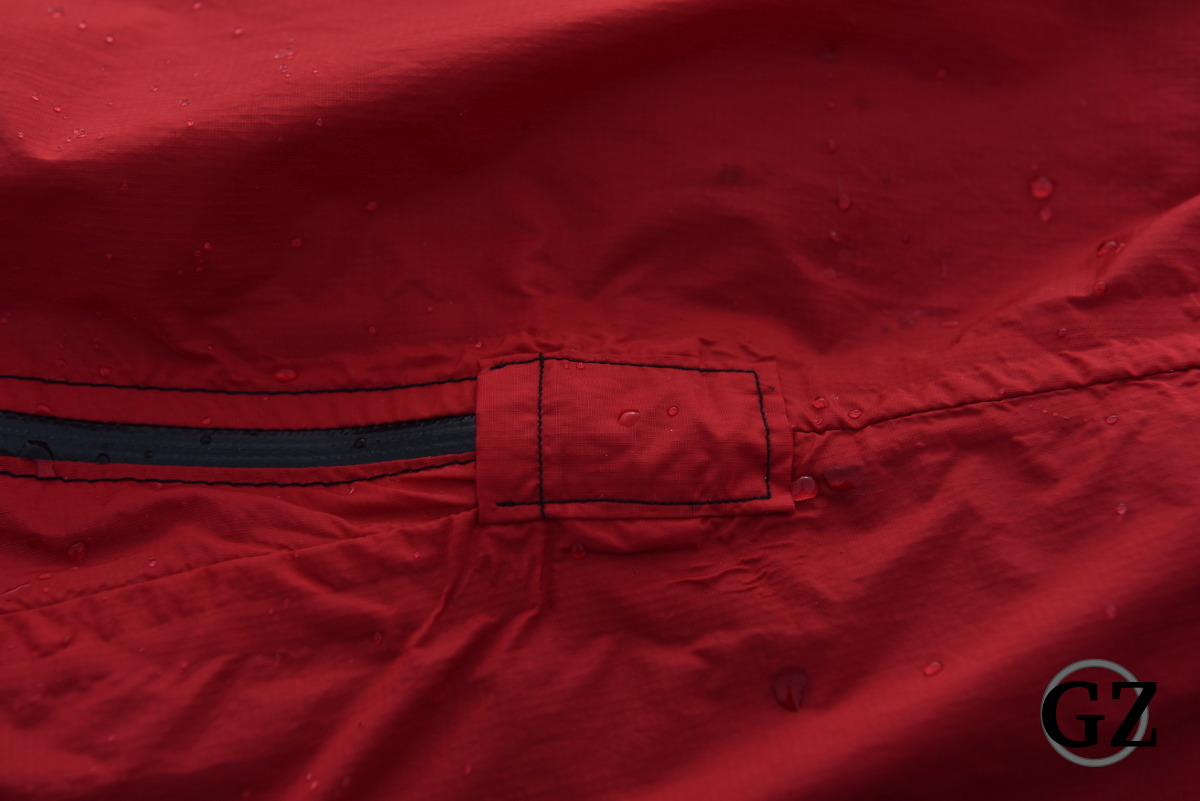
- Finally I covered the end of the zipper for better weather protection, and sealed the seams inside with a seamtape.

zipper end cover for better protection seams sealed with seamtape (inside)
- Making a pouch from left over materials.
I still had some durable polyester mesh at home, which I used for half of the pouch, so that the bivy could breathe/dry when packed.
DIY bivy bag II

Hi,
this article is very interesting.
I like you, are finding it hard to find pre-made bags, the way i want them.
I have no experience of wild camping. I am 65 years of age, and don’t have the luxury of time, to find out from experience what works and what does not work
I want to experience wild camping using a tarp. I am assuming that dew on my down sleeping bag must be avoided. Am I correct thinking that I just need protection from dew and wind.
The material in your article (Pertex) should suffice, or would you suggest an alternative. Could i slightly change your design pattern to place the zip on top with protection flap, as I will always be using a tarp.
Thank you for posting this article
Hi,
I have made this breathable bivy for use under a tarp, in foggy or humid nights (like autumn), as my old down sleeping bag would suck in all that humidity. Some sleeping bags do have a windproof and water repellent outer shell. In that case, this bivy model (i.e. with the Pertex) would not be necessary at all.
But yes, this material should also be able to keep dew out, as well as allowing to transfer humidity from the body out.
I think the pattern doesn’t really need a change or having zippers on top; just turn the zipper to where you feel comfortable having them (I used them right or left before, depending on which sleeping bag I used).
Enjoy your wild camping!
Down anything will loose its ability to warm once it is wet.
Thank you so much! I am in the proces of building my own bivvy bag as well. For use under a tarp, in Iceland.
Its for sleeping bag. Can we use the same materials for school bags? Water and wind resistant school and college bags.??
Hi,
I think for school bags you’ll find more suitable materials that are stronger, i.e. more durable, and that can even be water proof. For school bags, in my opinion wind proof would not need to be a criteria. Maybe something like Cordura (500 or 1000 den), or PU-coated polyester could be an interesting material for school bags.