
Since I am still experimenting with different kind of shelters for hiking, I made myself a tarp this year, in order to be more flexible and faster set up than with a tent. Here you’ll find how I created my tarp: What materials did I use, sewing instructions, and patterns.
Why a Tarp?
In the past years I have been experimenting with other types of accommodation than a tent, which I perceive as something where I am closed in in the meantime. I love the idea of being able to the see the sky before falling asleep, and also right after waking up in the morning. For this purpose I sewed myself a bivy bag two years ago, and it proofed as a great shelter in wintertime. For summer, though, with the possibility of rain, I wanted to have something more spacious. This should be more convenient during rainy days, but also more communicative for non-solo trips. I also like the idea that on a rainy day, you have a quick to set up shelter for cooking or resting. Thus I decided to make myself a tarp.
Materials & Considerations
Unlike for my earlier bivy project, the choice of material was much easier, as the fabric doesn’t need to be breathable. With the only criteria of having a water proof and light-weight fabric, my choice easily fell for a silicon coated nylon.
Main material
I found a 20den nylon, coated with silicon on both sides, with only 36 g/qm. Perfectly light weight, and with 2000mm hydrostatic head I thought enough water proof for its purpose. While the tear strength of min. 9,2 kg (DIN EN ISO 13937-4) seemed enough for the tarp, of course I wanted to strengthen the anchor points.
Other materials
Anchor Points
For this purpose I used old left over light weight tent floor with 90 g/qm, though since it is also a coated material, I made wholes into the individual pieces, so that water (for example from condensation) can escape.


For attaching tent stakes or lines, I found some very light-weight aluminum rings, with only 1.3 g each.
Webbing & Velcro
The rings are attached with a 10 mm webbing to the main material.
Since I wasn’t sure how much I can trust the strength of the main material, but also to make sewing easier (the silnylon is very slippery), I decided to sew the two fabric lanes on a ca. 20 mm thin and felxible webbing.
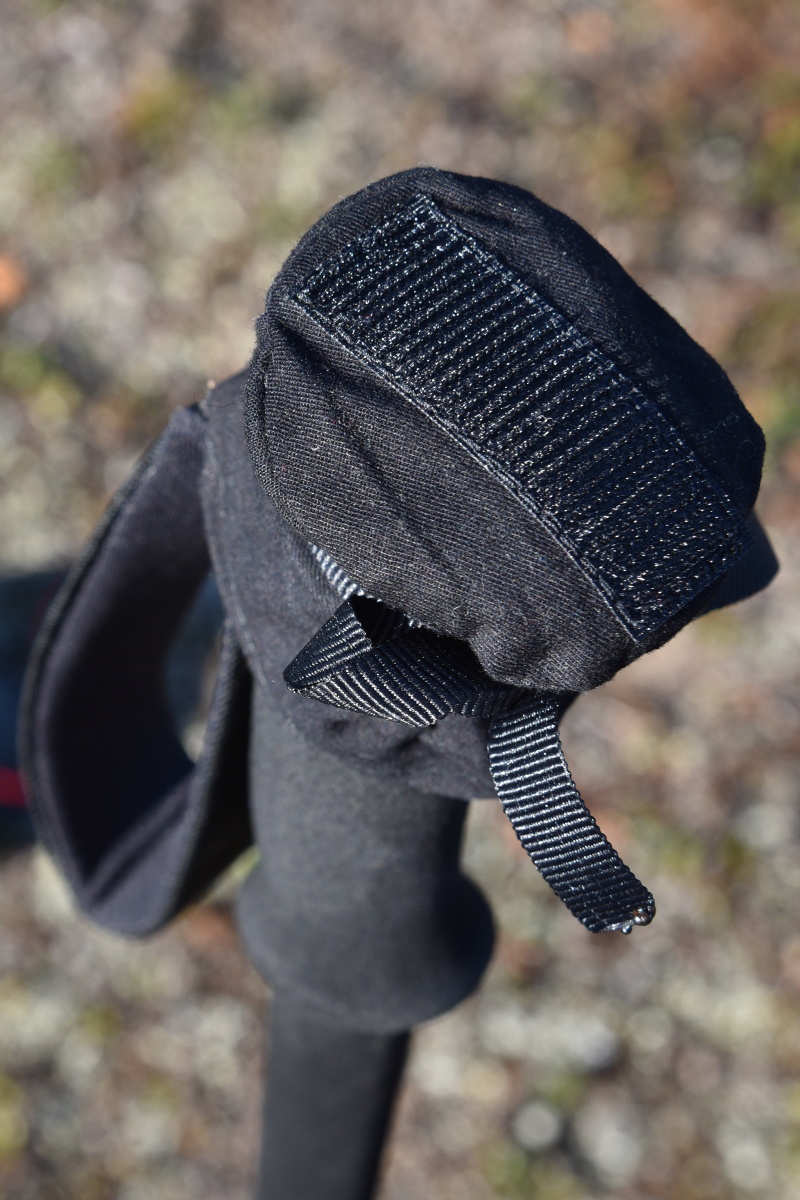
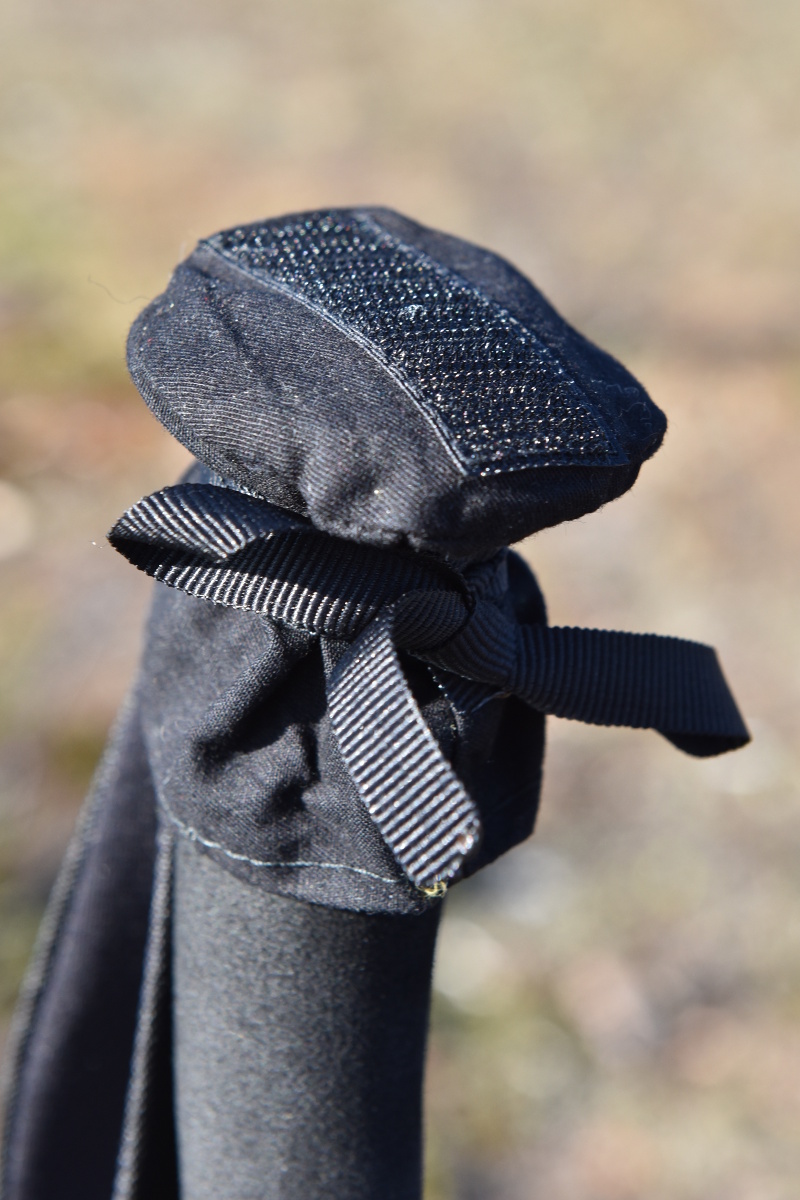
Since I often sleep somewhere in the tundra, there are no trees to attach the tarp to. When using poles only at the end, I was afraid that all the wind would blow through, but also that in stormy weather rain could easily come inside. Thus I wanted to be able to built up the tarp from inside, like a tent.
For this purpose my plan was to use hiking poles. Due to the slippery surface of silnylon it wouldn’t be possible to simply place the poles underneath. Consequently I got the idea to attach velcro in certain places to the middle webbing. With some left over fabrics I made kind of hoods with velcro for my poles, which only add a few more grams to the whole tarp.
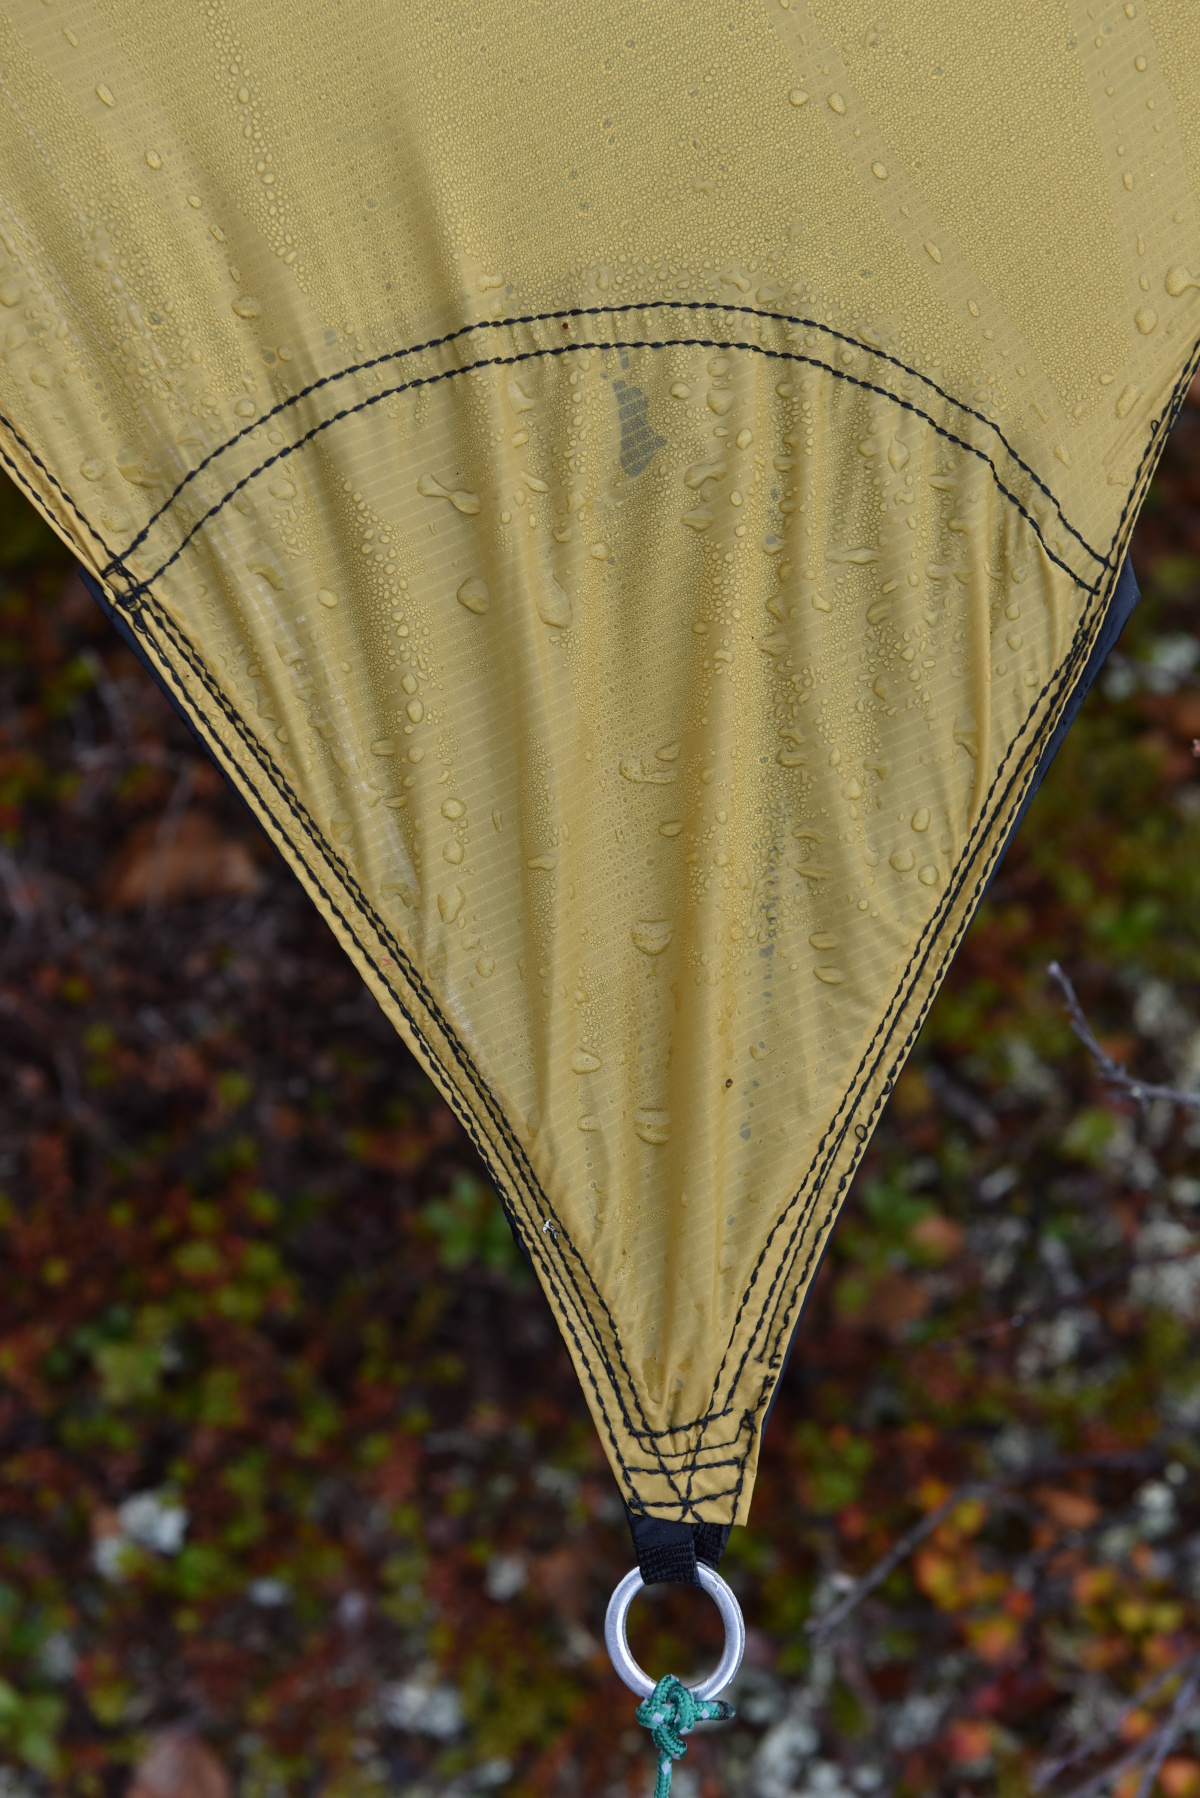
Water-proofing seams
While along the outer seams I used regular nylon threads, in the middle the main material is sewed with a nylon thread that has a cotton coating. The expanding cotton – when getting wet – should better seal the seams.
Additionally I attached a layer of silicon on the outside of the middle seams. It is recommended to put some talc powder (like baby powder) on top of it, to avoid having a sticky surface.
Other materials
For setting up the tarp I also got me some tent fasteners and a a reflective tent rope. And finally, I also sewed in some reflective piping in the top corners of the tarp.
Material List
- 7m of Ripstop Nylon tentfabric silicone coated, 20den, 36g/sqm
- 4m of 20mm webbing
- 2m of 10mm webbing
- 0.5m velcro
- 1 tube Silnet
- 10 pcs aluminum rings
- 10 pcs tent fasteners
- 30m tent rope (2.5mm)
- 0.5m of strong fabric for anchor points
- 0.5m of reflective piping
- 1 pkg of baby powder
As usual I got my supplies from:
Extremtextil (in Germany) and Shelby (in Finland)
Weights and Measures
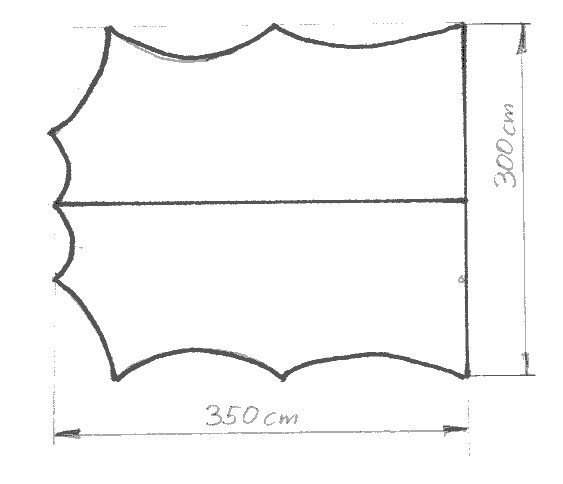
The tarp itself has outside measures of appr. 3×3.5 meters (9.8×11.5 ft). For packing the tarp I sewed a small pouch from left-over materials of the main material. In this (still pretty well compressible) pouch the bivy has packed measurements of 14×23 cm (5.5×9 inches). Including all cords, rings, pouch, pole hoods etc. it weights approximately 630 g (21 oz). The tent stakes I use with the tarp add another 130 g (4.6 oz).

HOW TO: Instructions for Making a DIY Tarp
- First I attached one side of the velcro on 5 places on the 20mm webbing; One in the middle, in the other more toward the edges, according to the height of my telescopic hiking poles.
- Then I sewed together the two pieces of 3.5m of my main material. I simply sewed them onto the 20mm webbing. Just make sure to at least have every side sewed with at least two layers and two seams.
- In a next step I cut the whole piece in form. I chose to not have straight edges, but curves, so it stands more stable in the wind and less prone to make noise.

Sketch of tarp pattern - After cutting the tarp sheet according to the patterns, I folded the edges 3 times and made two seams all around the sheet.
- Then I cut stronger fabric in pieces, according and fitting to each corners/anchor points.
- Before sewing in the additional fabric, I made holes into it, so that water can escape from in between the two coated fabrics. If you have an uncoated or non-waterproof fabric, you may not need to do this step (I guess the weight reduction is negligible).
- Between additional fabric and main material I added 10mm webbing, which stands a bit out at the corners, and where the aluminum rings are sewed in.
- For the anchor points along the middle webbing I additionally sewed in reflective piping
- After everything was sewed together, I put Silnet on the seams in the middle, and after drying I put some baby powder on top of it.
- For the hiking poles I made a hood with velcro on top, to get a better fix of the poles under the tarp.
- With some of the leftovers from the material I made a nice pouch for the tarp.
Pictures of Tarp in Action
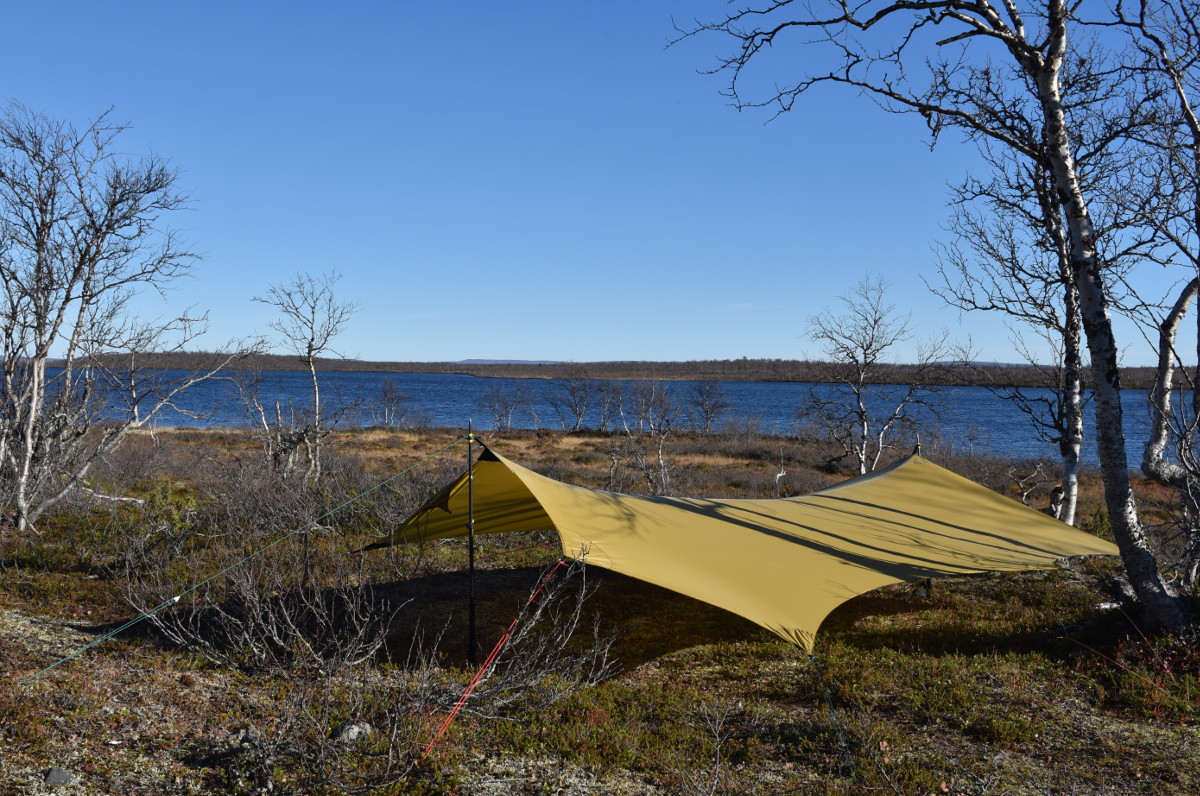

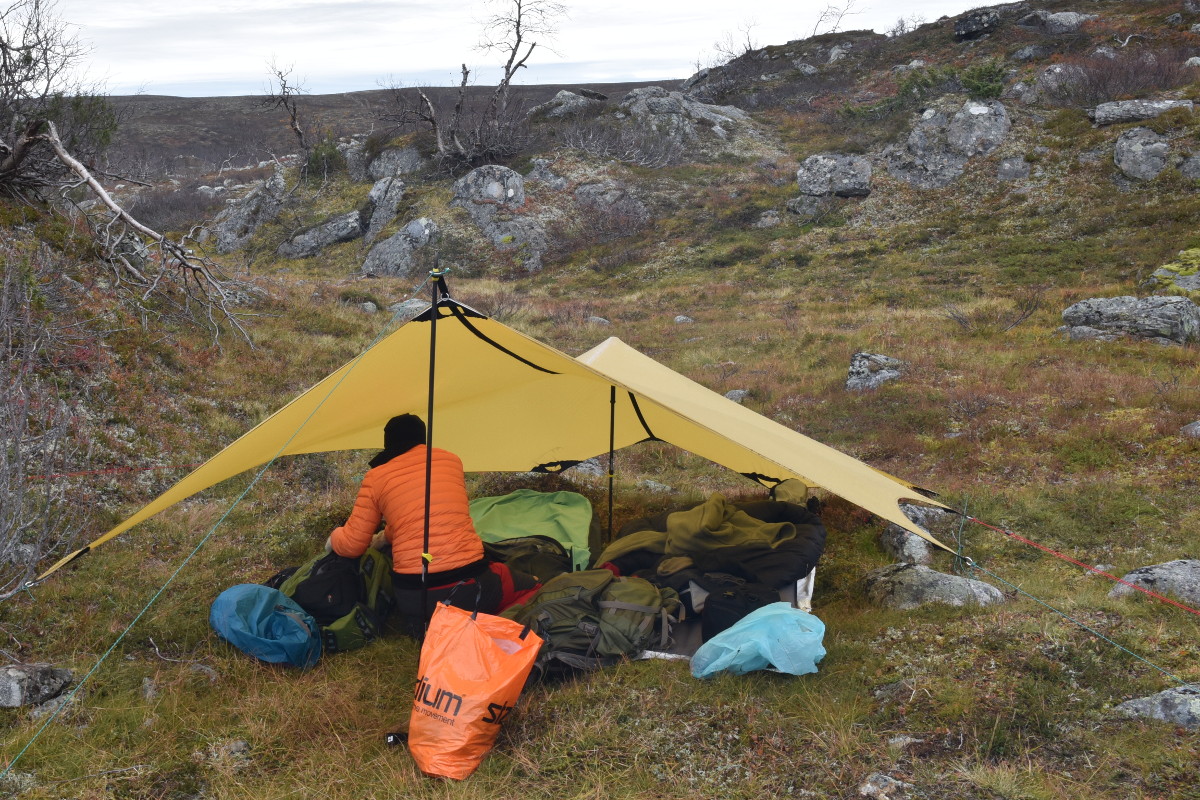


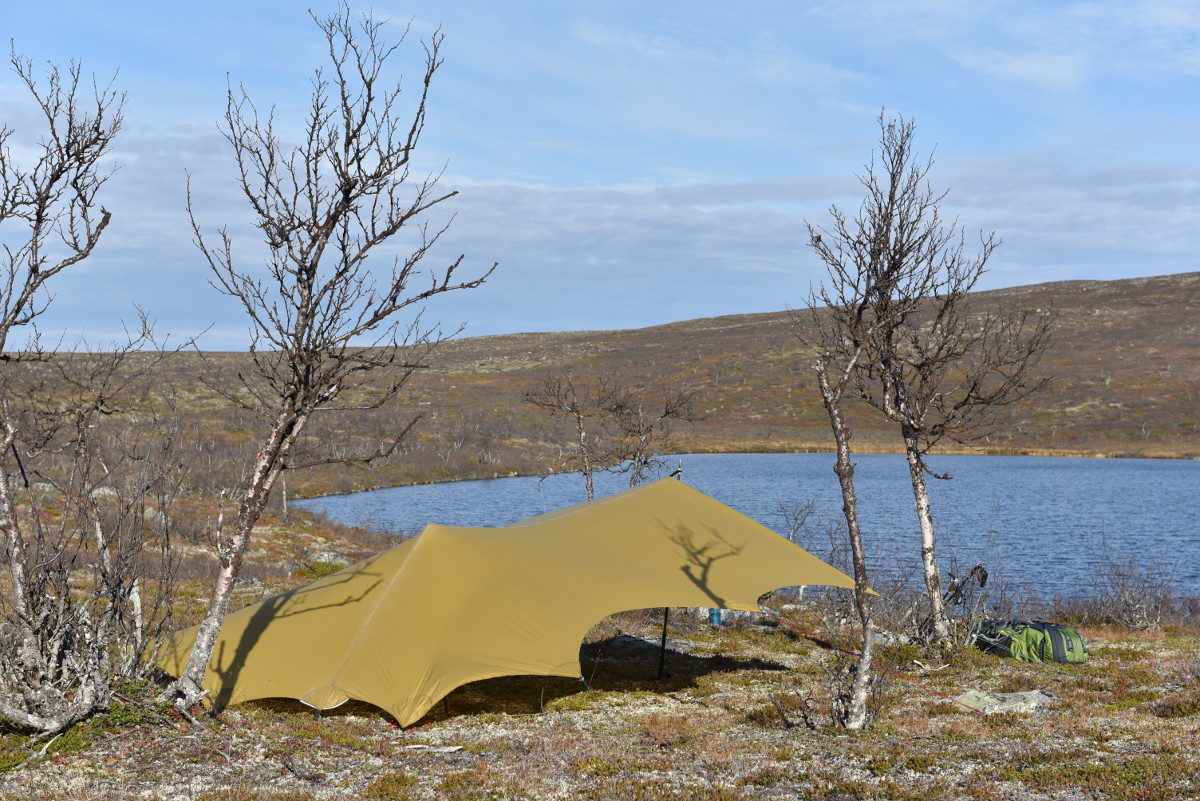


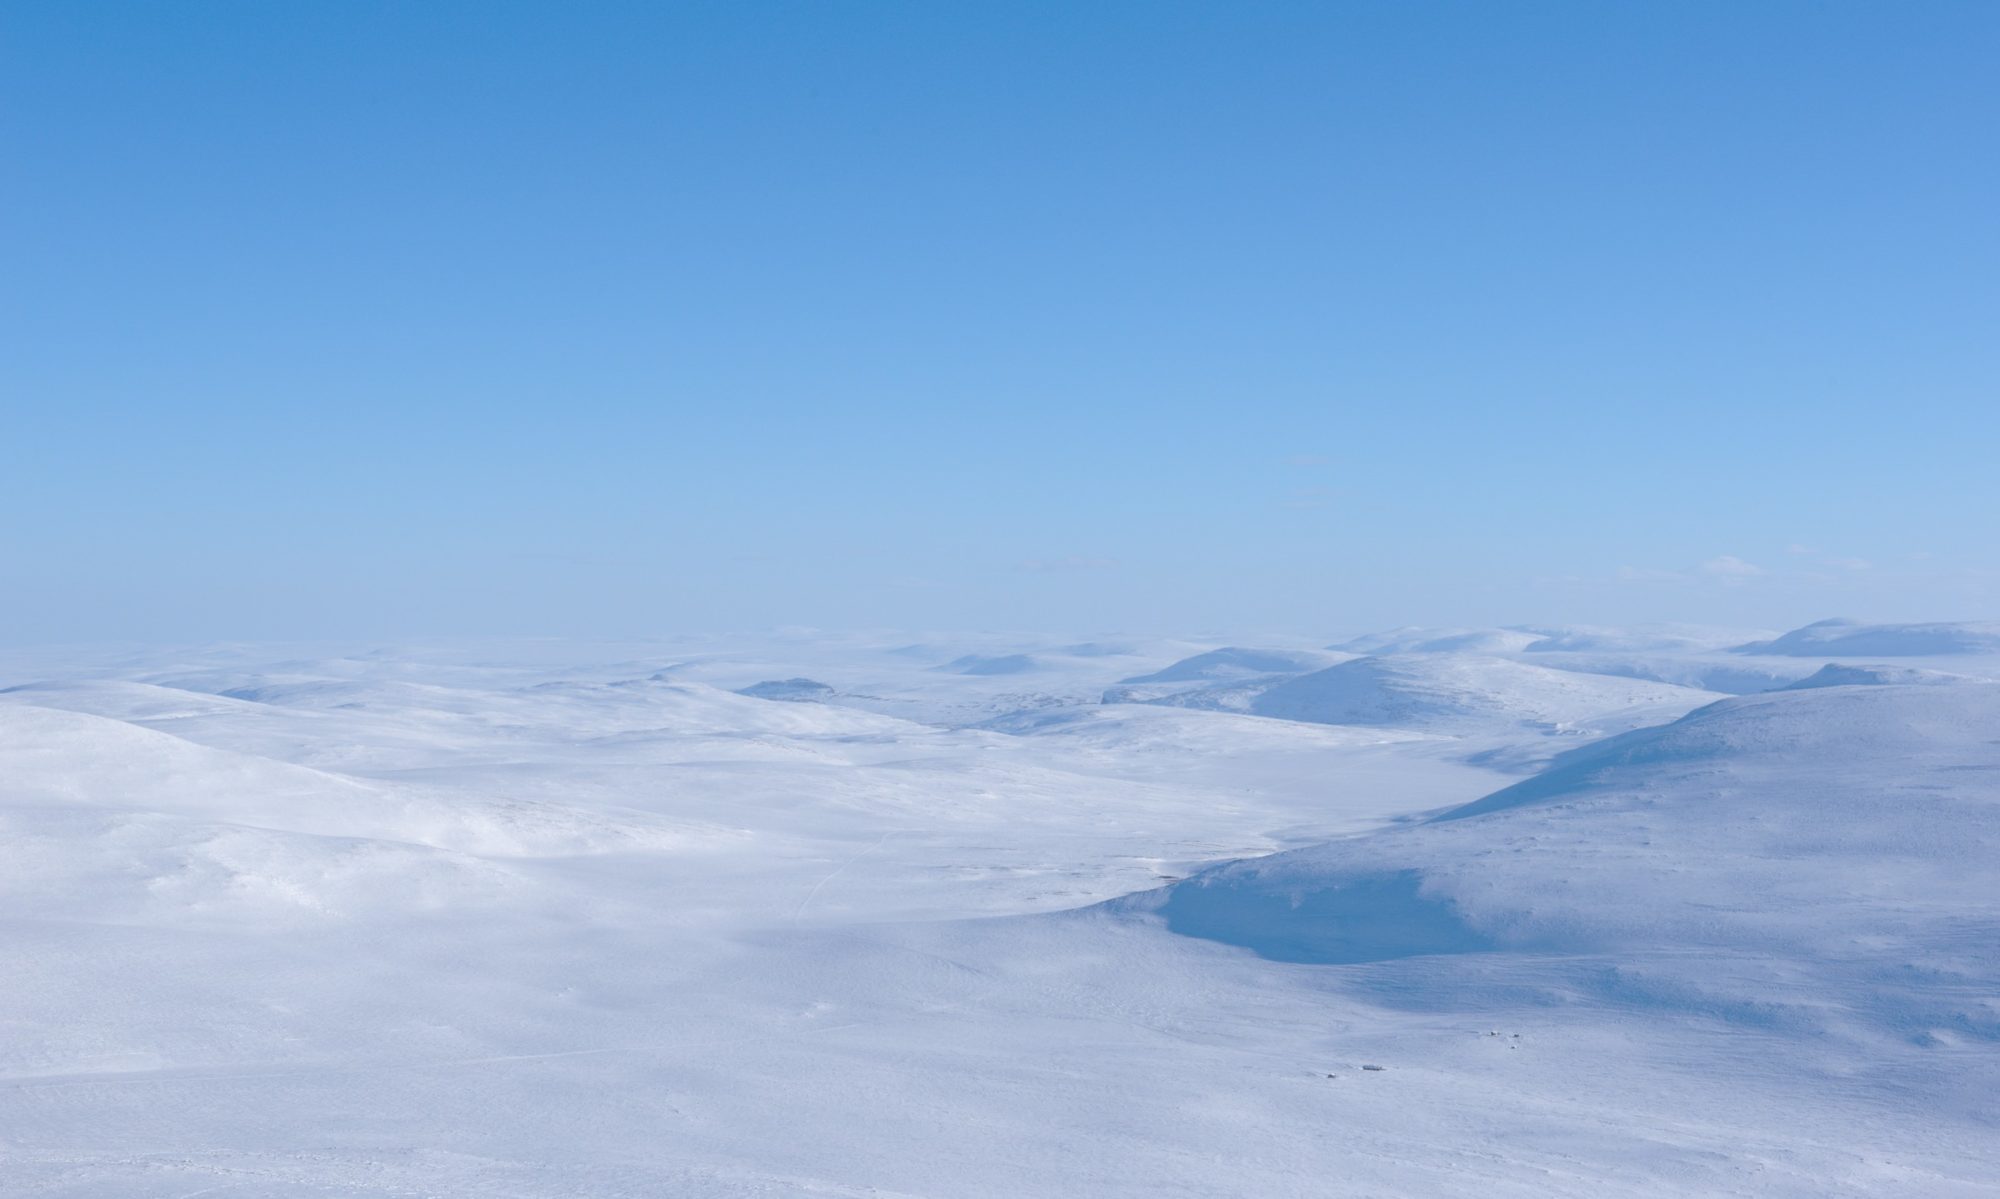
Some trips (with images) where the tarp was used
Näkkälä to Vuontisjärvi
Kalmakaltio to Vunotisjärvi
Maattojärvet
Retkajärvi
Tarvantovaara Wilderness Area
Käkkälöjoki boat hike
Pöyrisjärvi wilderness area

Hello again Gerald!
Time for some feedback on your tarp after all these years! :-)
Does it still keep out rain? Am in the choice and agony of a new tarp of 36 grams or 55 grams (extremtextil.de). The water column then differs 2000 to 3500. Would like to try in the same material as yours (and size), if you still recommend it?
Regards Petter
Hi Petter,
the tarp still holds off water very well. It has now 8 years on its back, and I regularly use it during summer and autumn (in winter I prefer to travel with my bivy bag). Despite it being a lightweight fabric, the tarp is still intact. Though, I do treat all of my gear with good care in order to maximise its lifetime. Anyhow, no holes or anything in the tarp, and the silicon layer appears to be still covering the whole fabric, and water is still repelled as on day one. I am definitely satisfied with the material.
Hi,
Thanks for sharing!
One question, why did you not choose silpoly. According the supplier side the fabric you took stretch when wet.
Help me choose the right material.
Br anders
Hi Anders, to be honest, I can’t remember anymore how I came to the conclusion to use this material. It might be, that I did not have silpoly on my map, or maybe there was a reason. But yes, the material expands when wet. Usually this doesn’t really cause a problem. But if it is windy, or if I had the tarp hanging low, I just add more tension in the lines and it is fine. So I don’t really see it as a problem.
Cheers,
Gerald
Many thanks and Merry Christmas and a Happy New Year. :-)
Hi again Gerald! I forgot to ask why you wanted a lower curvature? Because that’s what you mean by larger radius, right? Less rain and wind inside? If so, would that mean that it would be more difficult to tighten the fabric, do you think, and perhaps more sound? Will order the fabric soon :-)
Regards again
Petter
Hi Petter!
Yes, you guessed right: I think that the curvature along the 350cm sides goes too deep. The main idea of having some curvature and not a straight line is to have it more sturdy and stable in wind, as well as to reduce noise. I think a big radius, and thus taking out less material, going less deep, should do that trick as well.
As you can see for example from this picture: https://gerald-zojer.com/blog/wp-content/galleries/2016-09-poyrisjarvi-wilderness-area/P%C3%B6yrisj%C3%A4rvi-Wilderness-Area_0037.jpg the cut-out of the material is quite extensive, leaving space for wind and water (rain) to go trough.
I am quite happy though with the shape on the back side, as it allows to have it quite tight on the ground and only little wind gets through. On the sides, however, I took out a bit too much of the material. So in a second version I would reduce this. Though, as long as the tarp lasts (and I don’t see much wear yet) I will continue to use it as is, but may put my luggage in the opening to get better shelter from wind. :-)
I wish you good luck with your project! In case you use a similar material, (something silicone coated), be prepared that the material is super slippery. Maybe you find a rubber foot or something similar for your sewing machine. It could be quite helpful.
Cheers,
Gerald
Hi Gerald!
Your work with that Tarp has been so inspiring. Made a smaller shelter with 40D tentfabric just for rainprotection during fishingtrips. I think I will try to sew one like yours. I would like to know if you still use it and how has the durability been with the thin fabric? 20D? In strong wind? Etc.
Regards
Petter
Hi Petter, thanks for your comment.
I still use this tarp regularly, and I have so far been very satisfied with it. Especially I like the versatility for putting it up in different position.
the material is still holding well, no cracks or holes or anything, and it also still keeps out water well.
This summer I had 2 days in a storm, with strong rain and (short) hail showers. the tarp did it’s job and kept everything dry.
The only thing I would change on that patterns above is, that I would keep the radius on the sides (i.e. the two along the 350cm sides) a bit larger than on the sketches above. But I guess, I would go for that material again.
Good luck with making your own tarp!
Thanks for taking the time to share your experience. Great shape tarp.
Very Nice : i wanna get out and do some nights under tarps this year in Pretoria, thinking ill use one instead of a bivvy next time i m night fishing.
Looks great. I like the design – so many more options than a regular square tarp.
Thanks a lot for your kind comment!
I think particularly the possibility to place the poles in the middle proofed to increase versatility; an option that I can easily recommend :-)